

Bulk Orders Available
Special Pricing for Schools, Colleges & Businesses


Couldn't load pickup availability


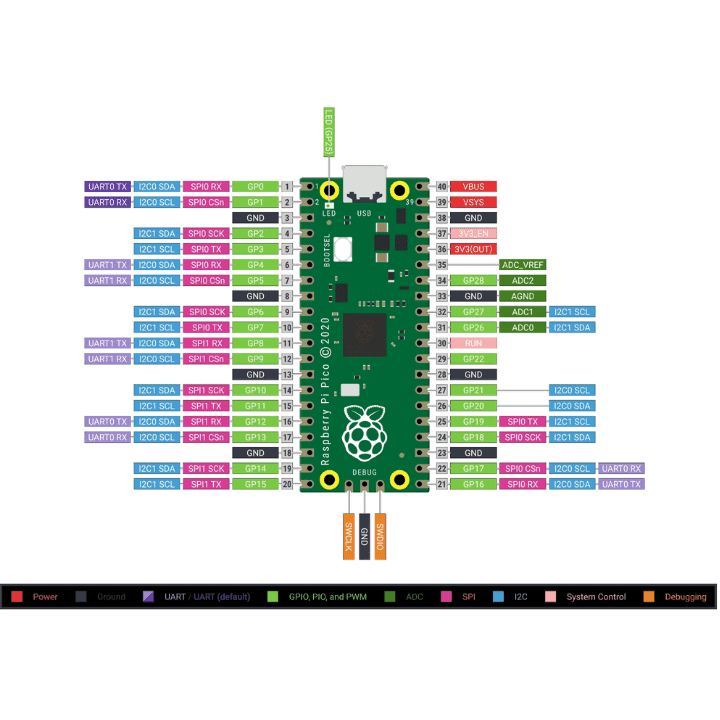
The Raspberry Pi Pico is a powerful and flexible microcontroller board and one of the newest additions to the Raspberry Pi family of development boards. It is built around a custom-designed silicon chip developed entirely by the Raspberry Pi Foundation, making it a unique and efficient solution for embedded systems and electronics projects.
The Pico board is designed to help users get started quickly with development, whether they choose to use the official C/C++ SDK or the MicroPython programming environment. It combines low cost, high performance, and flexible digital interfaces, making it suitable for both beginners and experienced developers.
At the heart of the Raspberry Pi Pico is the RP2040 microcontroller, which features a dual-core Arm Cortex-M0+ processor with a flexible clock speed of up to 133 MHz. The board also includes 2 MB of onboard flash memory for program storage and 264 KB of SRAM for efficient data processing.
To build projects with the Pico, developers often use additional components such as breadboards, power supplies, push buttons, jumper wires, and display modules, which make prototyping easier and more flexible.
The board is designed with castellated edges, allowing it to be soldered directly onto custom carrier boards for embedded applications. It also provides a very user-friendly programming method using drag-and-drop programming over USB mass storage, making development quick and simple.
Orders placed before 3 PM IST will be shipped on the same day (excluding Sundays and Public holidays) through our shipping partners. In rare cases, the pickup may get delayed during Public holidays / Bandh / Environmental disturbances.